From jar to joy: How to pickle at home
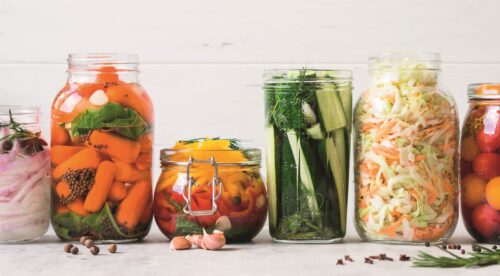
This is an edited extract from Pocket Pickler: Essential recipes for pickles, chutneys, relishes and more by Alex Elliott-Howery. Published by Murdoch Books RRP$29.99
Pick of the crop
It’s delicious, low-waste, from-scratch cooking that’s good for you and your budget. If you’ve ever wanted to try pickling, now’s a great time.
Sterilising jars and bottles
● To sterilise jars or bottles, give them a wash in hot soapy water and a good rinse, then place them upright in a baking dish in a cold oven. Heat the oven to 110°C and, once it has reached temperature, leave the jars in the oven for 10–15 minutes, or until completely dry, then remove carefully.
● For hot packing, pour the hot mixture straight into the hot jars; for cold packing, allow the jars to cool before adding your pickles or preserves.
● To sterilise the lids, place them in a large saucepan of boiling water for 5 minutes, then drain and dry with clean paper towels, or leave them on a wire rack to air dry. Make sure they are completely dry before using.
Heat-processing
1 Also called water bathing or canning, this process uses heat to stop the growth of bacteria. It generates pressure inside the preserving jar or bottle, which forces out any oxygen, creating an uninhabitable environment for microorganisms, lengthening the shelf life of preserves, and providing a proper seal.
2 Get the biggest pan you have, such as a stockpot – the taller, the better – and put it on the stovetop.
3 Lay a folded tea towel in the bottom of the pan, then sit your jars on the tea towel, taking care not to cram them in, and keeping them clear of the sides of the pan. (All these measures are to stop the jars from wobbling around and cracking as the water boils.) Roughly match the water temperature to the temperature of the jars (to help prevent breakages from thermal shock), then pour in enough water to cover the jars, either completely or at least until three-quarters submerged.
4 Bring to the boil over medium heat. The heat-processing times given in these recipes start from boiling point, and will generally be 10–15 minutes for jars or bottles up to 500ml capacity, or 20 minutes for larger capacities.
5 Once the heat-processing time is up, the lids should be puffed up and convex. Carefully remove the hot jars from the water.
6 Line your jars up on the benchtop and let them sit overnight. As they cool, a vacuum will form inside each jar and suck down the lid, sealing them securely. In the morning, the lids should be concave: either get down to eye level with the top of the jar to check for the telltale dip in the lid, or lay a pencil across each lid to show the cavity below it. If you have concerns about the seal of any of your jars (sometimes a couple of jars fail to seal correctly), store them in the fridge and use their contents within a few weeks.
Pickle like a pro
Create these sensational preserved delights right in your own kitchen!
- Gherkins
- Pickled roasted fennel
- Ginger cucumber pickle
- Chilli and capsicum pickle
- Pickled baby carrots
Related content:
www.healthyfood.com

 Achieve your goals
Unlock your ultimate healthy eating toolkit
Get instant access to everything you need to plan, shop and eat well in one place.